Using the client
Overview
The Redcherry Client lets you watch live and recorded video from your Redcherry server. It is a cross-platform application that runs on Android, iOS, Windows, macOS, and Linux.
Download, Installation
Refer to README.md for installation instructions.
Requirements
You will need a Redcherry server to use this application. You can buy a license from the Redcherry website.
Connecting to the server
These steps will guide you through easily connecting to your Redcherry server. You can add as much servers as necessary. The steps are similar for all platforms.
1. Enter the hostname or IP address of the Redcherry server. The default login and password for new installations is Admin and bluecherry. You can optionally click Use default to have this information automatically entered for you.
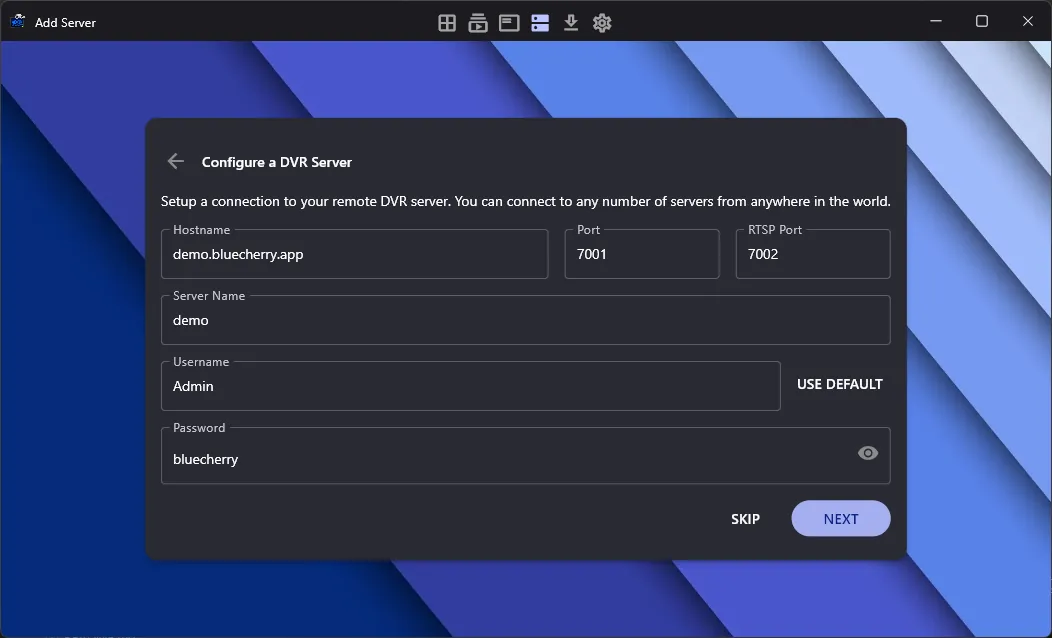
Click Next to connect.
2. You can optionally change some settings for the server, such as the streaming type, RTSP protocol, and rendering quality.
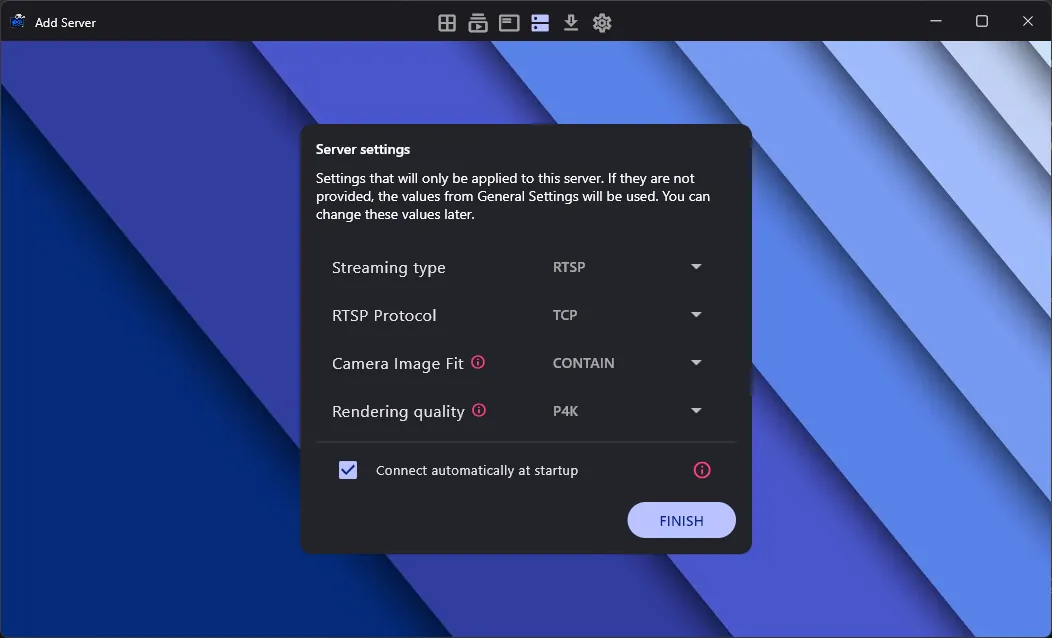
You can optionally leave these as they are. Click Finish to add the server.
3. If the server was successfully added, you will be able to see the server in the server list and view the cameras.
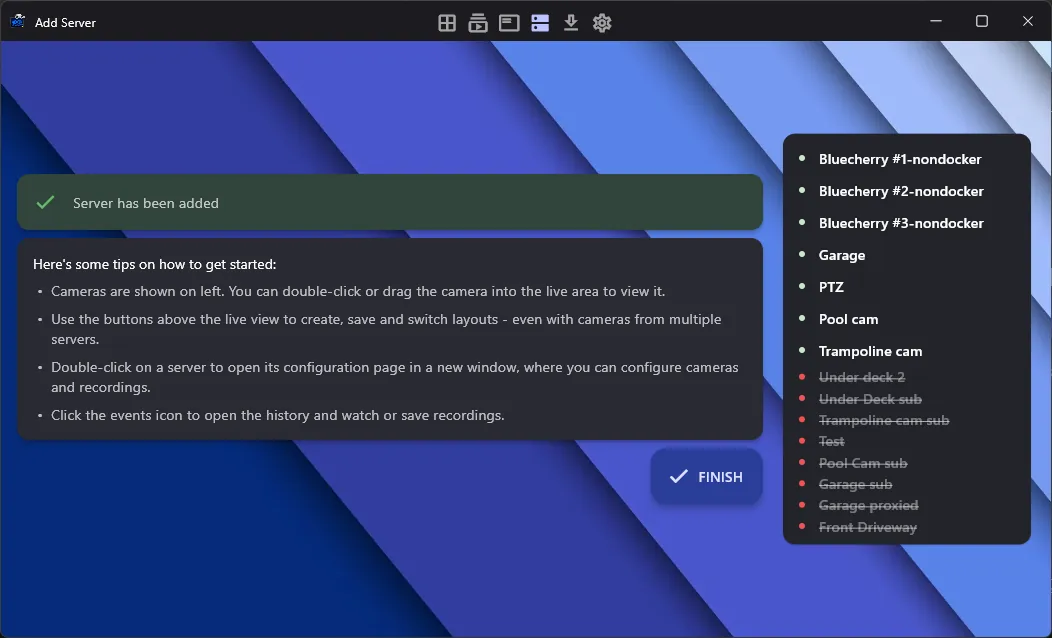
Click Finish to close the process.
Viewing cameras
After your server is added, you will be redirected to the camera list. You can view the live video from the cameras by clicking on them or by dragging them to the layout.
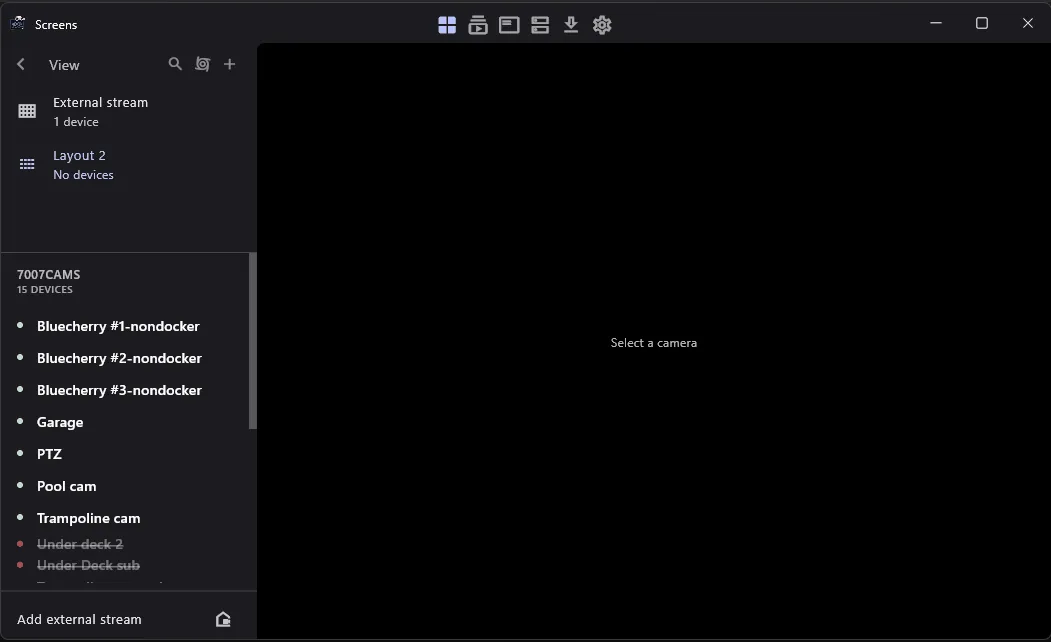
You can repeat this process or any camera or NVR that you have listed on the left side. Note: It’s possible to connect as many devices together as you need, and mix and match the videos in different layouts.
PTZ
The PTZ feature allows you to control the pan, tilt, and zoom of a camera. To enable it, click on the PTZ button on the camera tile.
ℹ️ Info
The PTZ feature is only available for cameras that support PTZ. If the camera does not support PTZ, the PTZ button will not be available.
You can press and move the mouse to control the camera.
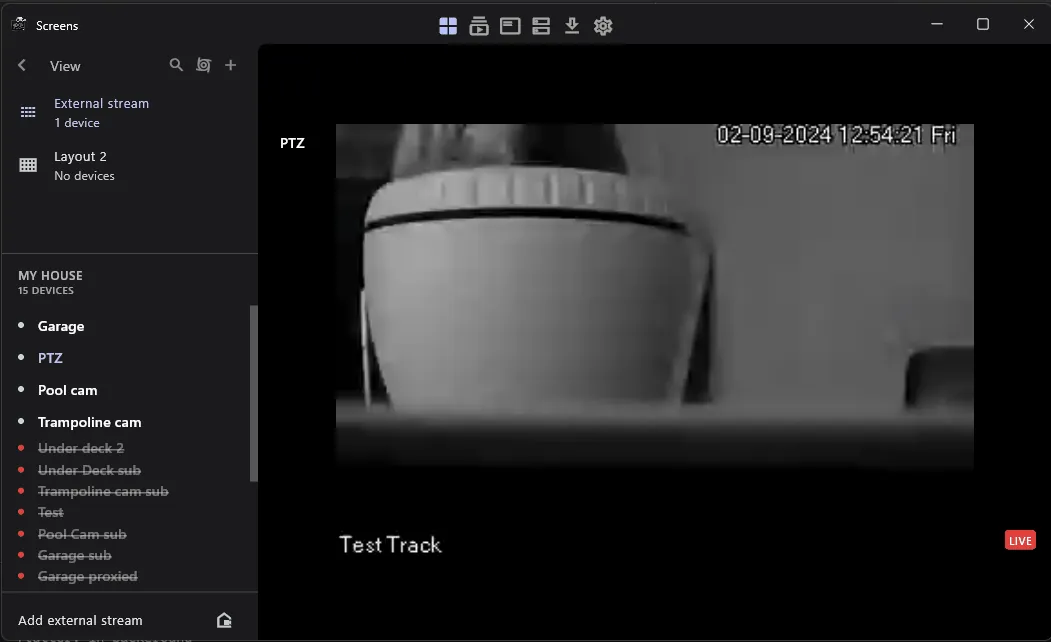
You can perform the following movements:
- Pan: Press and move the mouse left or right.
- Tilt: Press and move the mouse up or down.
- Zoom: Scroll the mouse wheel up or down.
The PTZ movements are scheduled and will be executed after the previous movement is completed. Depending on the speed of the internet connection, you can experience minor delays between the movements and the camera response.
ℹ️ Info
It is recommended to wait for the camera to complete the previous movement before performing another one, but scheduling multiple movements is possible.
⚠️ Attention
PTZ zoom is not supported on mobile devices. See this issue.
[beta] Matrix zoom
The matrix view is a feature that allows you to zoom into a camera. This is useful for multicast streams. This works better with cameras with larger resolutions.
To enable it, go to Settings -> Updates -> Beta Features -> Matrix view zoom.
![[beta] Matrix zoom — capture d'écran](img/2c5c8d1b3bd1432d.webp)
Layouts
You can create layouts to organize the cameras. You can add cameras to the layout by dragging them from the camera list to the layout.
Multiple Layout
The multiple layout allows you to view as many cameras as you want in a grid. The grid will adapt to the number of cameras you add.
Compact layout
The compact layouts creates a 2x2 grid with sub 2x2 grids. This is useful for viewing a large number of cameras in a small space.
Cycling
You can enable the cycling to change the layouts automatically at a given interval (defaults to 30 seconds). This is useful for monitoring a large number of cameras.
External streams
You can add external streams to the layout. This is useful for adding streams from other sources, such as webcams, IP cameras, or other Redcherry servers.
To add an external stream, click on the Add external stream tile and enter the stream URL:
In the example above, we add a test video to the layout.
External streams are added to the External Stream layout.
Open app from configuration file
You can open the app from a configuration file. This is useful for opening the app from a web browser or from a file manager. The configuration file is a .bluecherry file that contains the devices data.
Here is an example of a configuration file:
[stream]
video = rtsp://demo.bluecherry.app:7002/live/1

[videoscreen]
fullscreen = false

[audio]
sound = true
- The
streamsection contains the video URL. The app will try to connect to this URL when it is opened. - The
videoscreensection contains the fullscreen setting, which determines if the app should open in fullscreen mode or add the video to the layout. - The
audiosection contains the sound setting, which determines if the stream should have sound or not.
You can open the app from the configuration file by double-clicking it and opening it with the Redcherry Client.
Additionally, you can add overlays to the video by adding the following sections to the configuration file:
[overlay]
text = "This is overlay number threee"
size = 24
color = #000000
opacity = 80
show = true
position_x = 10
position_y = 30
- The
overlaysection contains the text, size, color, opacity, show, position_x, and position_y settings. The overlay is persistent and will be shown on top of the video. - The
position_xandposition_ydetermines the position of the overlay on the video, being0the top-left corner of the video.
The overlay can be edited from within the app:
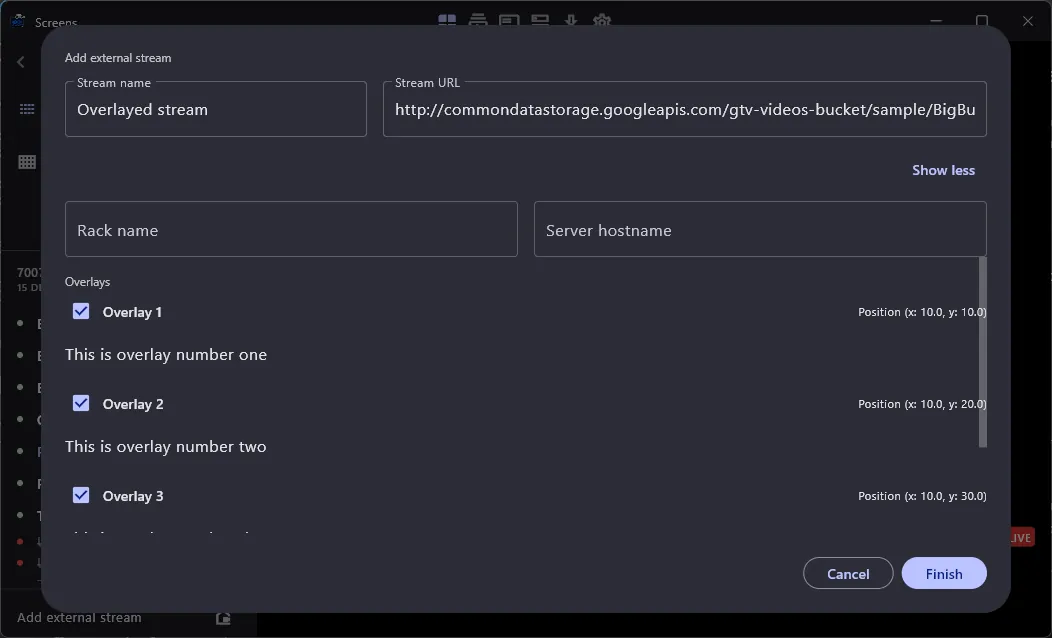
Press Finish to add the stream to the layout.
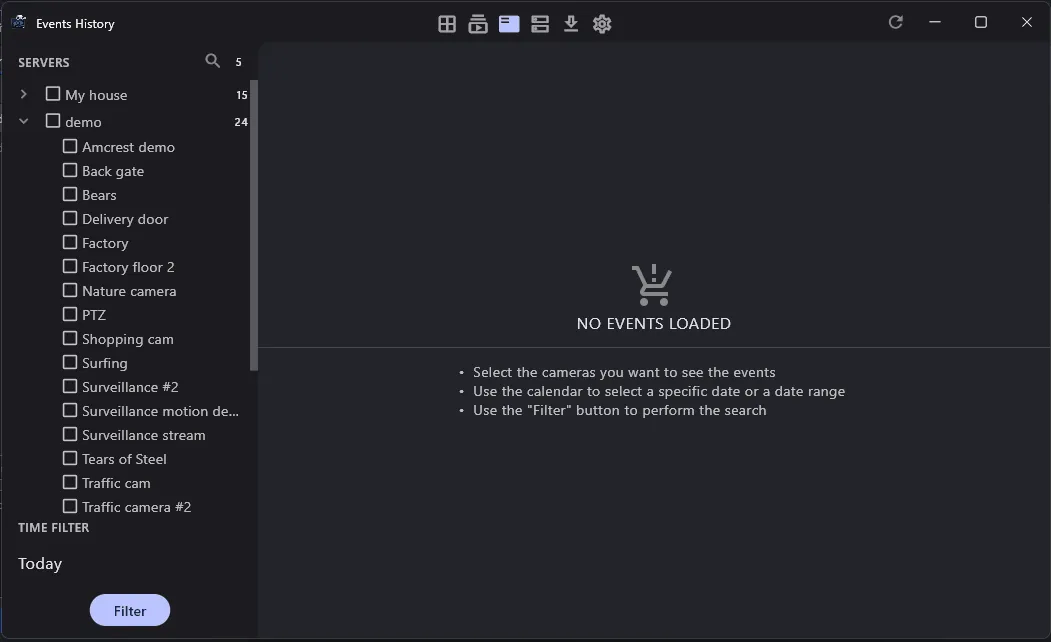
Events
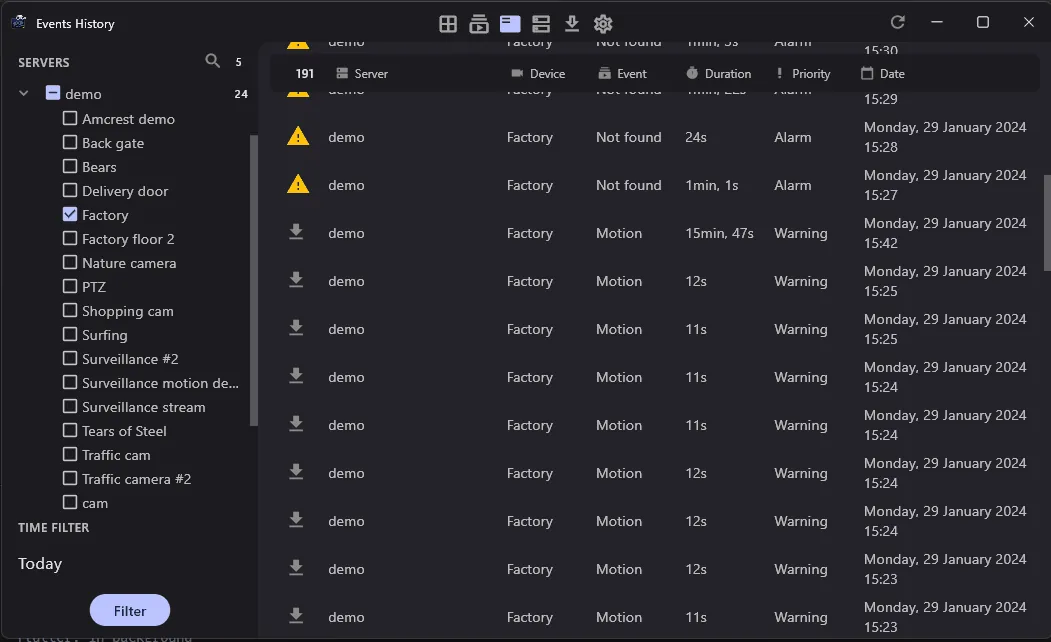
The events section allows you to view the events that were recorded by the server. You can view the events by clicking on the Events History tab.
Browse Events
Select the camera you want to view the events and click on the Filter button. You can filter the events by date range.
Timeline of Events
The timeline of events allows you to view the events in a timeline. This is useful for quickly finding events. You can filter the events by date.
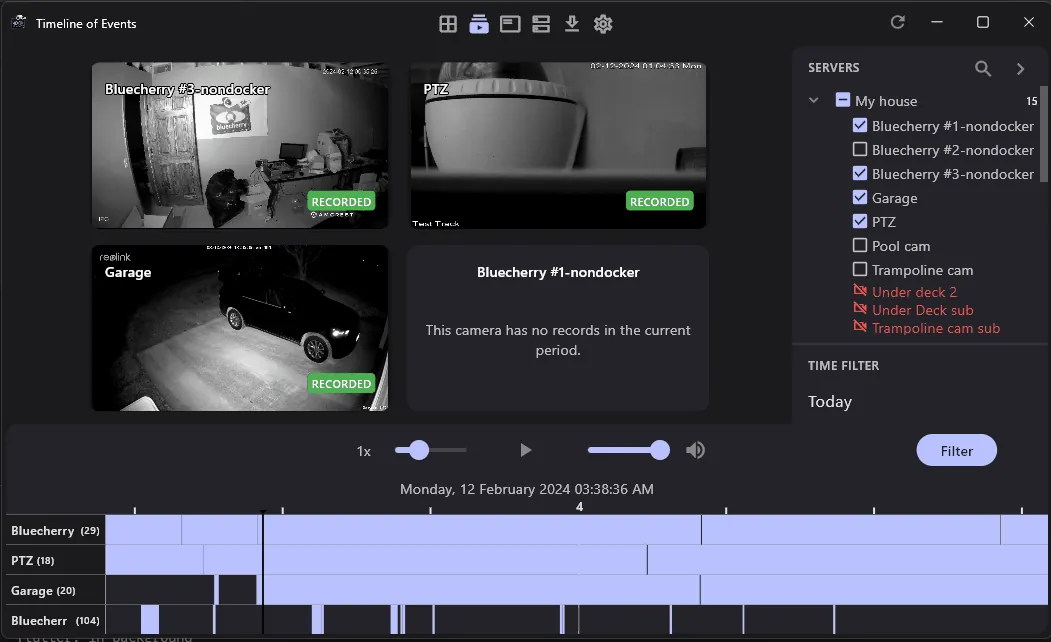
ℹ️ Info
You can only view 6 cameras at the same time in the timeline of events.
ℹ️ Info
Use the mouse scroll wheel to zoom in and out of the timeline. Use the arrow keys to move the timeline forward and backward.
Downloads
You can download the events by clicking on the Download button. To see the downloaded events, click on the Downloads tab.
ℹ️ Info
You can choose the download location in the Settings. The default download location is the Downloads folder.